Pillywiggin Postscripts
A Blog for Art, Garden & Nature Enthusiasts
|
Christmas morning, 26 degrees but the sun is shining. We ventured out to snap a few photos for a holiday greeting online and... 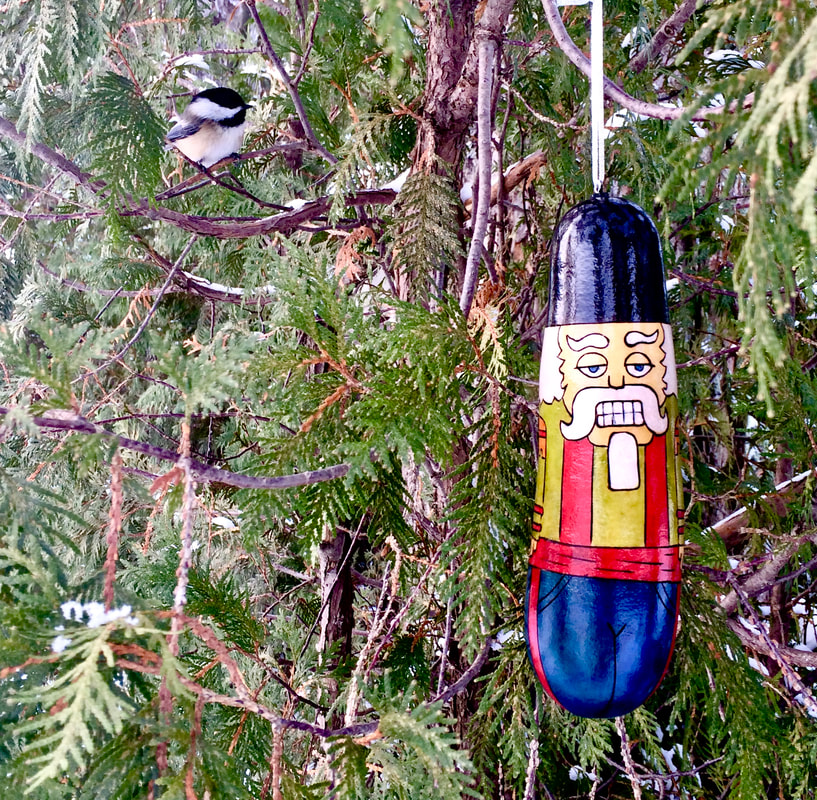 We were photo-bombed by a curious little chickadee! Now that's a Pillywiggin Christmas! 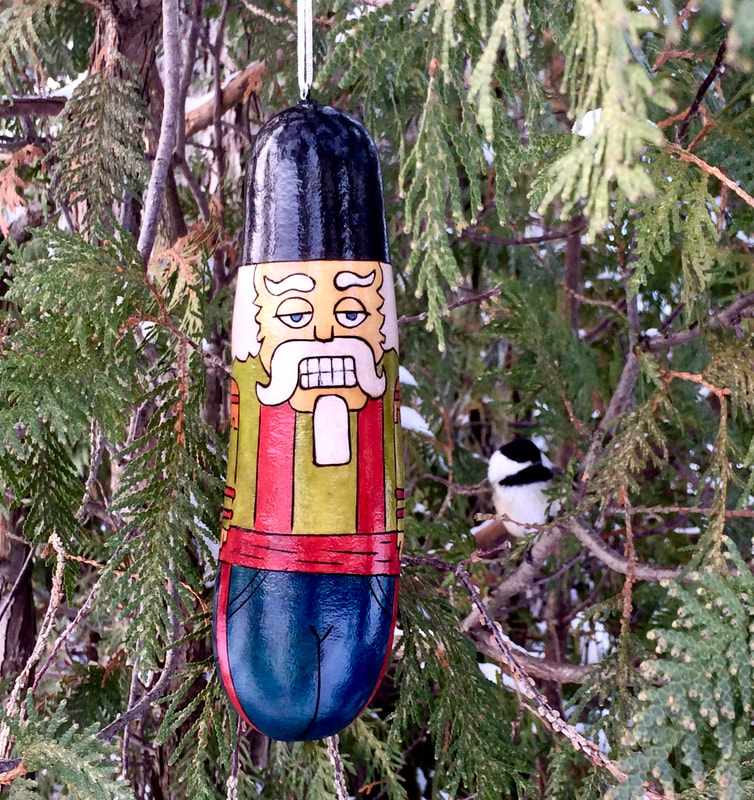 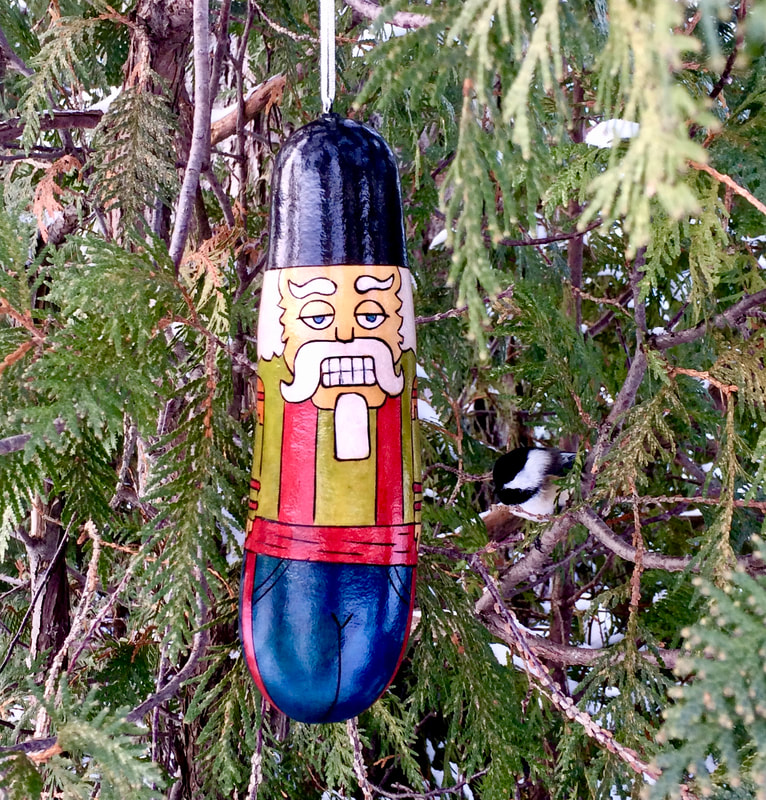
 Happy Holidays & Warm Wishes To All! Love, The Pillywiggins 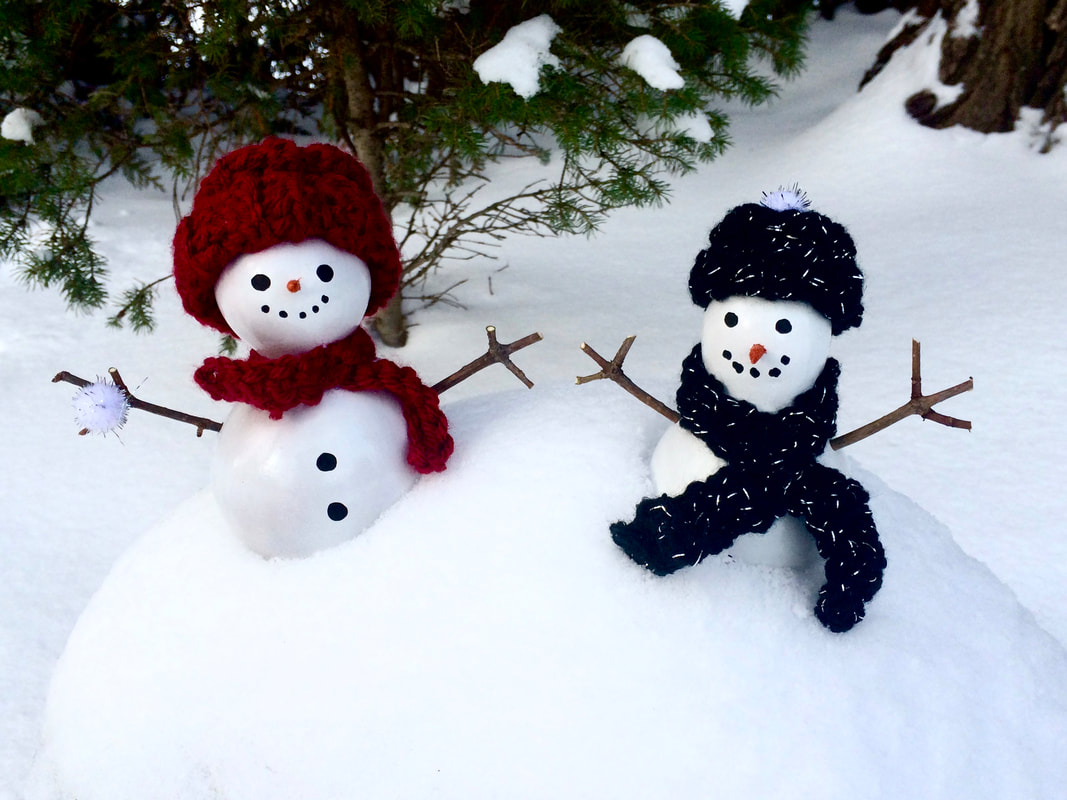 Special thanks to Lynn Tuthill for outfitting our snowmen with these awesome hats & scarves! We love them!
0 Comments
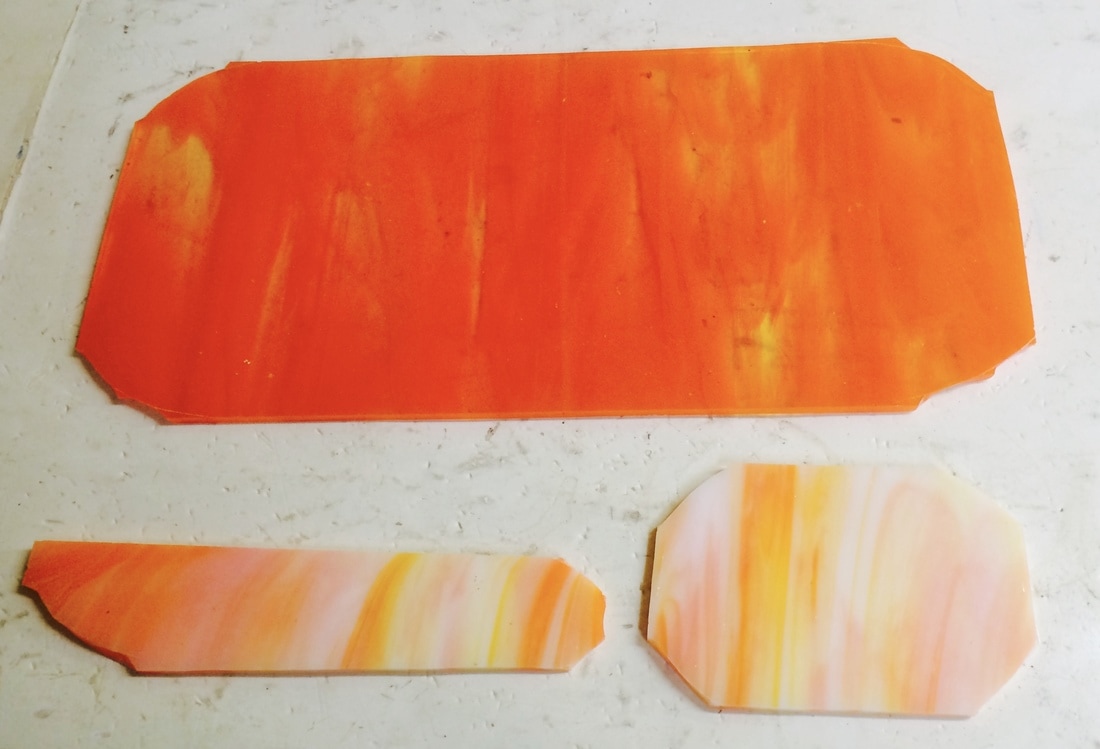
Working with glass is very different from my work with gourds. When I work with gourds it's a collaboration. Like master & apprentice, the gourds are the designers and creative directors in charge. I just listen and follow their instruction to help them achieve their vision. This partnership between man & gourds spans the globe and dates back thousands of years. A good argument could be made that gourds domesticated man, not the other way around. Gourds are patient and forgiving of our mistakes. Glass, well that's another story... I decided to share this project despite its unfortunate outcome. I did learn a lot from my mistakes and for the 1st time I actually had some decent photos of my work. (Always look for the positives, right?) I hope you enjoy my first of what's sure to be many D-DIY Tutorials Don't Do It Yourself! Learn from my mistakes and remember... Don't ever get discouraged, flops happen. Calico Cat PlateI wanted to make a calico cat dish to fit my oblong plate mold. Using a paper template the shape of my mold, I cut the 1st layer of glass to create the base of my plate - the cat's body. I cut the base from a large sheet of orange semi-transparent streaky glass I'd been dying to use. I also had a 10x10 piece of opaque streaky glass that reminded me of an orange creamsicle. I decided to cut the opaque streaky glass to create the cat's head & tail. I really liked the look of the two streakies together. I was off to a good start!
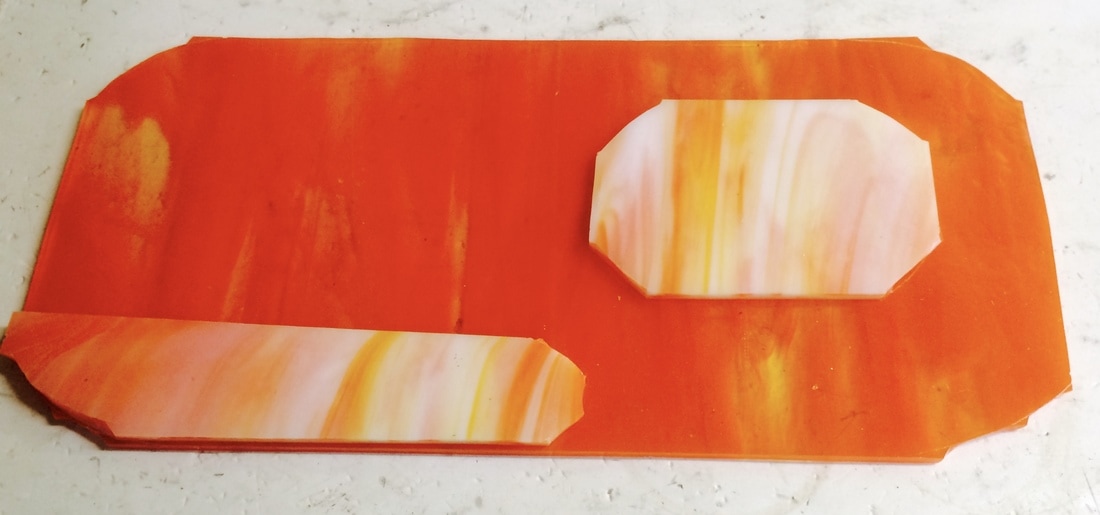 Note the edges on the transparent orange streaky glass. I had a little trouble getting clean breaks along my score line with this glass. It looks rough before firing but I knew the glass would round out in the kiln and wouldn't be noticeable after a full fuse. I'm not one to measure. I usually just give it the ol' eyeball and hope for the best but I did rely on my template quite a bit for this project. 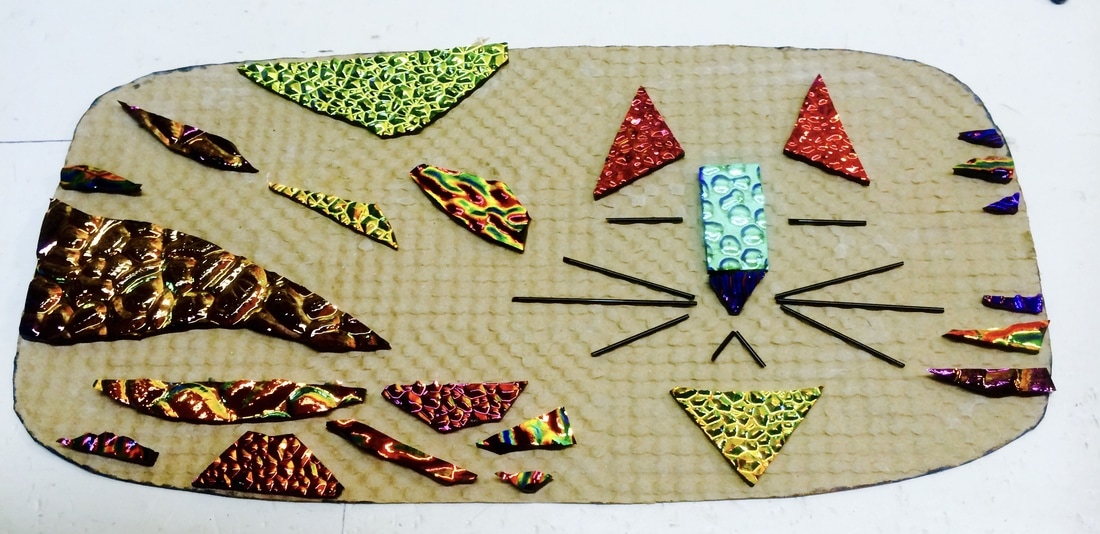 I chose an assortment of dichroic on black glass scrap pieces to create the cat's ears, nose & calico markings. I used black stringers to create the eyes, whiskers and mouth. Stringers are long thin pieces of glass that look like uncooked spaghetti.  For strength my plate had to be thicker so I capped the cat's body, head and tail with a thicker sheet of clear glass cut just a hair larger than my base pieces. You can see the uncut clear glass in the photo below. Don't ask me why I decided to cap the head and tail too. That was Mistake #1 - Additional & unnecessary weight. 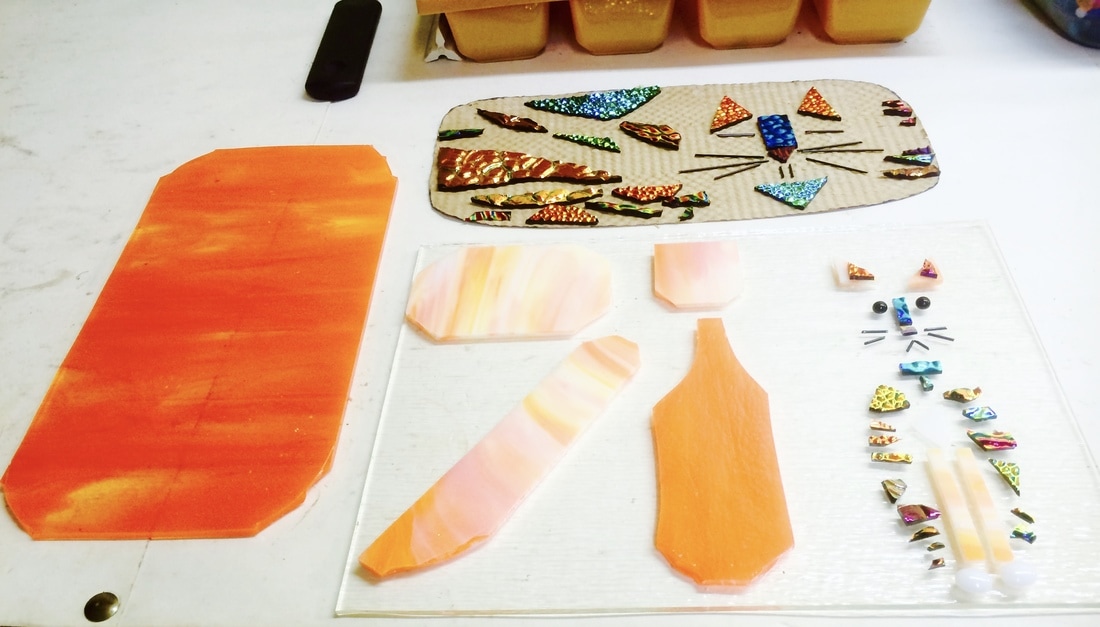 I decided to use the scraps from my plate project to create a calico kitty ornament. I worked on both projects simultaneously and fired them together.
The results of the first firing shown below. My 1st fire was a full fuse with a top temp of 1450F. This firing fused the colored base and clear glass cap into a single piece of smooth, flat glass. Yes, I know you should only fuse 2 layers together at a time but I decided to live dangerously (and run the risk of bubbles forming) by adding the dichroic pieces on top of the clear cap during my 1st fire. I should have added the dichroic pieces in a second firing. Most of the dichroic was textured glass and quite a bit of the texture remained after firing. I was pretty pleased with myself. Uh-oh. Mistake #2 - Over confidence.  I cleaned my pieces again and began prep for my 2nd fire. Cleaning is an important part of glass fusing. If you fire glass with fingerprints and smudges you'll be stuck with them. I use 99% isopropyl alcohol to clean my glass. It works great but if you have a small cut or a sliver of glass in your finger you'll know it! The 2nd firing was a contour fuse to secure the head, tail and ears onto the body. Top temperature for this fire was 1350F. The lower temperature of the contour fuse allows the head, tail & ears to permanently attached to the base. The edges soften but the definition & dimension remain even in the thin whiskers. You can see below that I fired the kitty ornament with its head still detached. I didn't want the whiskers & eyes to move during the 2nd firing and they probably would have had the base of the kitty's head been set on top of it's neck & body. The kitty ornament would get one final firing after this one to attach the head to the body. FYI - The kitty ornament turned out perfectly but of course, I forgot to take a final photo of it. 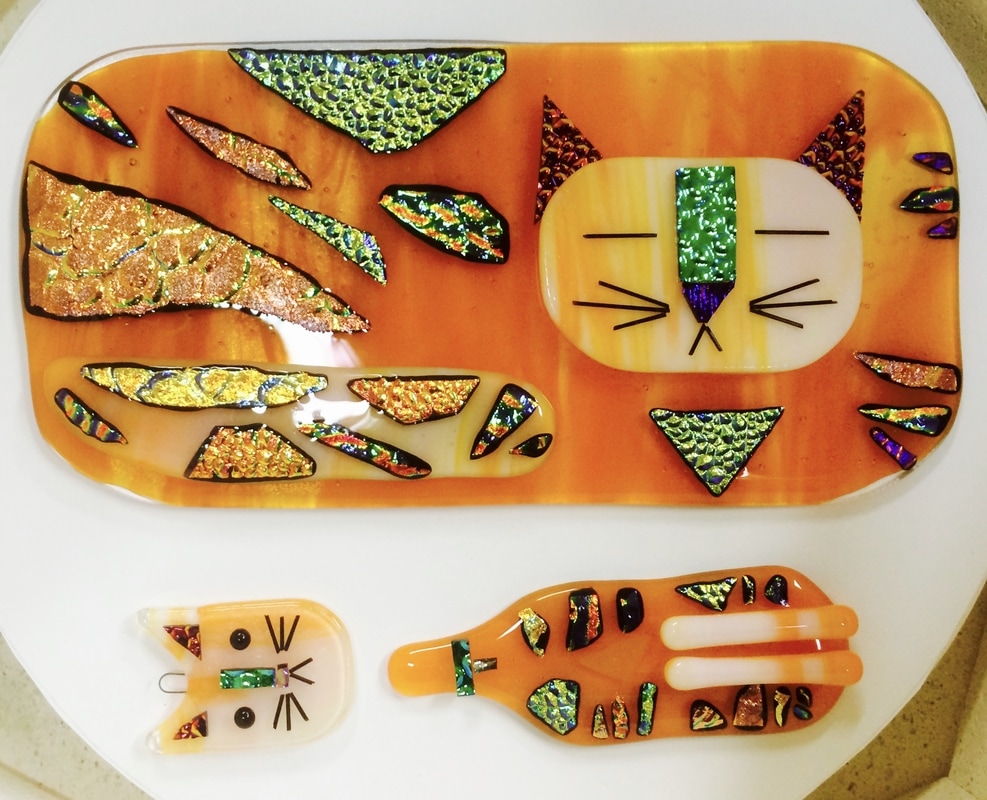 The 3rd and final firing for the cat dish was the slump. The glass was centered on the dish mold and fired to 1290F. At that temperature, the flat piece of glass will sag into the mold taking on the shape of the dish. Piece of cake, right? Wrong!! This is where all of my mistakes along the way resulted in one big GLASS-TASTROPHY. Mistake #3 was not slowing my ramp up in the kiln. That means I raised the temperatures too fast inside the kiln on the way up to my top temp. 300 degrees per hour. Way too fast for a project this large & thick. As soon as I opened the kiln and saw this mess I knew what I had done wrong. @!*$%#!! 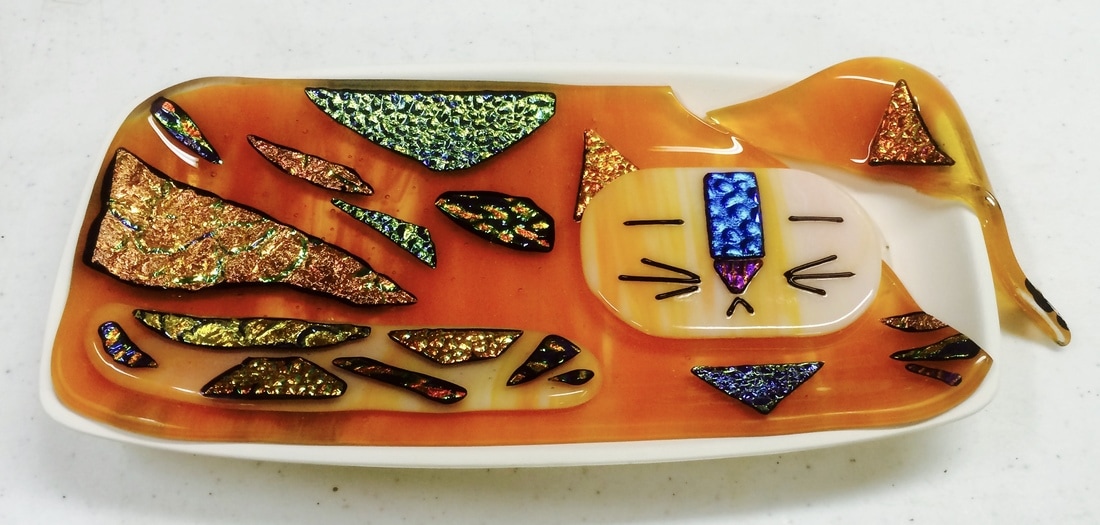
 Here's the final result. I think it's the prettiest, most expensive flop I've made to date. I'm not sure what I'm going to do with it yet but all is not lost. There's a popular saying in the glass fusing community. "Never refuse to re-fuse!" I could slump it again to flatten it out then try to fuse the pieces back together. I could cut it up and use the pieces in other projects. Or, I could smash it and use the pieces in a pot or screen melt. Hmmmm. Decisions, decisions. I think for now I'll just leave it on my work table to remind myself to
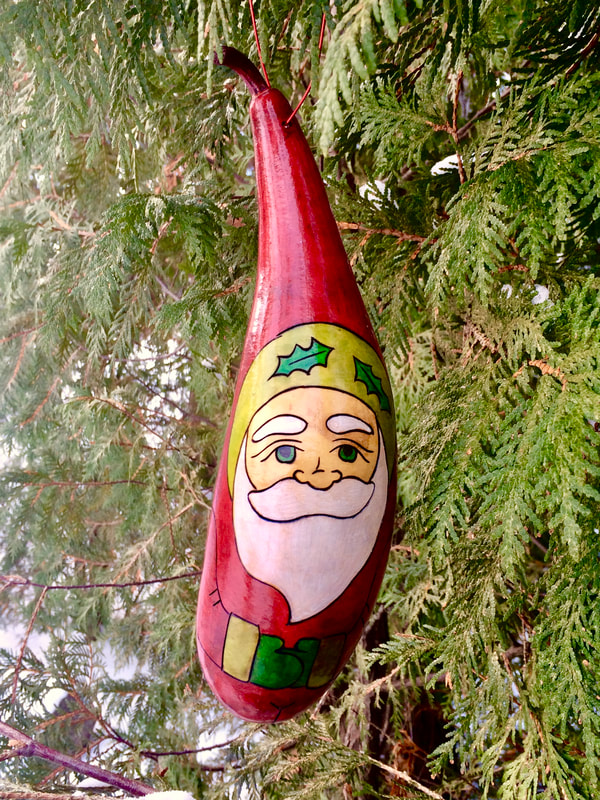
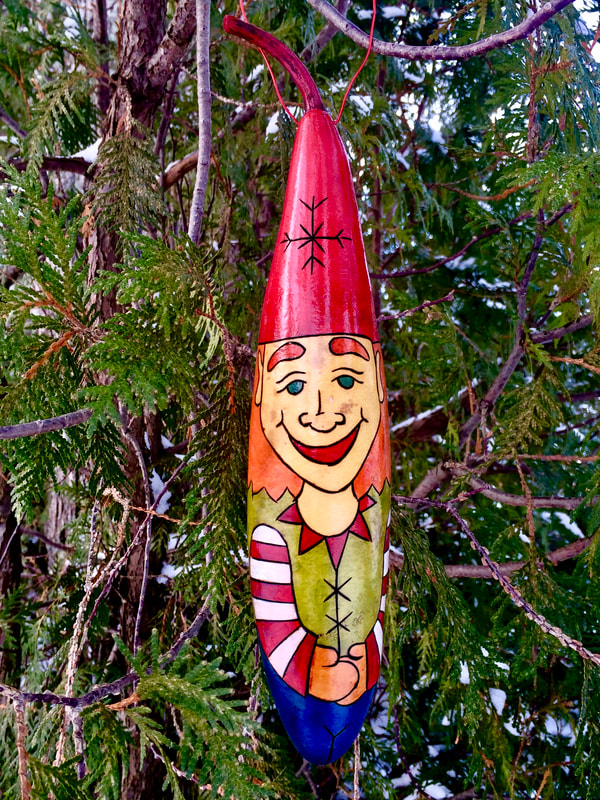
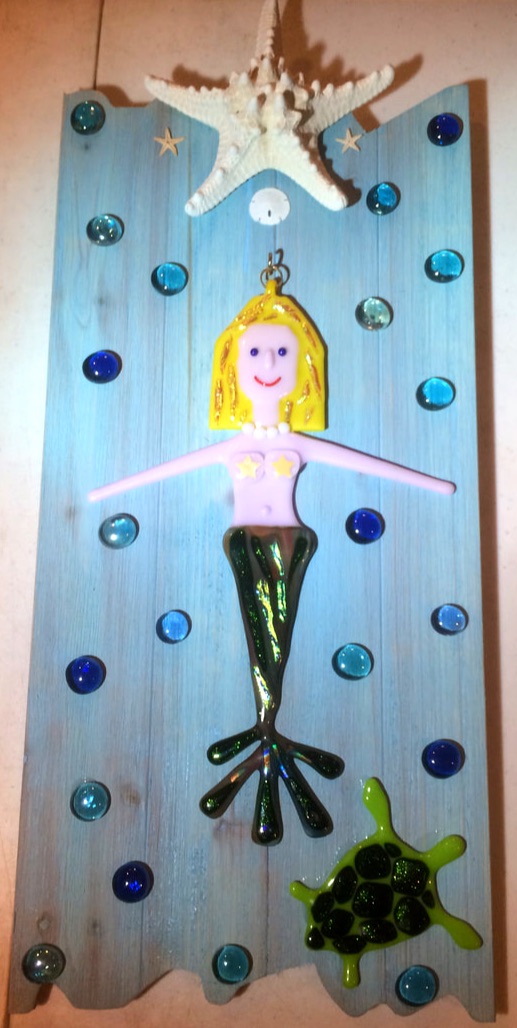
Slow Down! Santa isn't the only one who's been busy in the workshop! Although legend says Pillywiggins hibernate during the winter months, we know better. Pillywiggins are down in the workshop having fun, experimenting with materials and creating new art projects. Glass, gourds or whatever happens to strike our fancy. Pillywiggins are growing more than just great gardens! 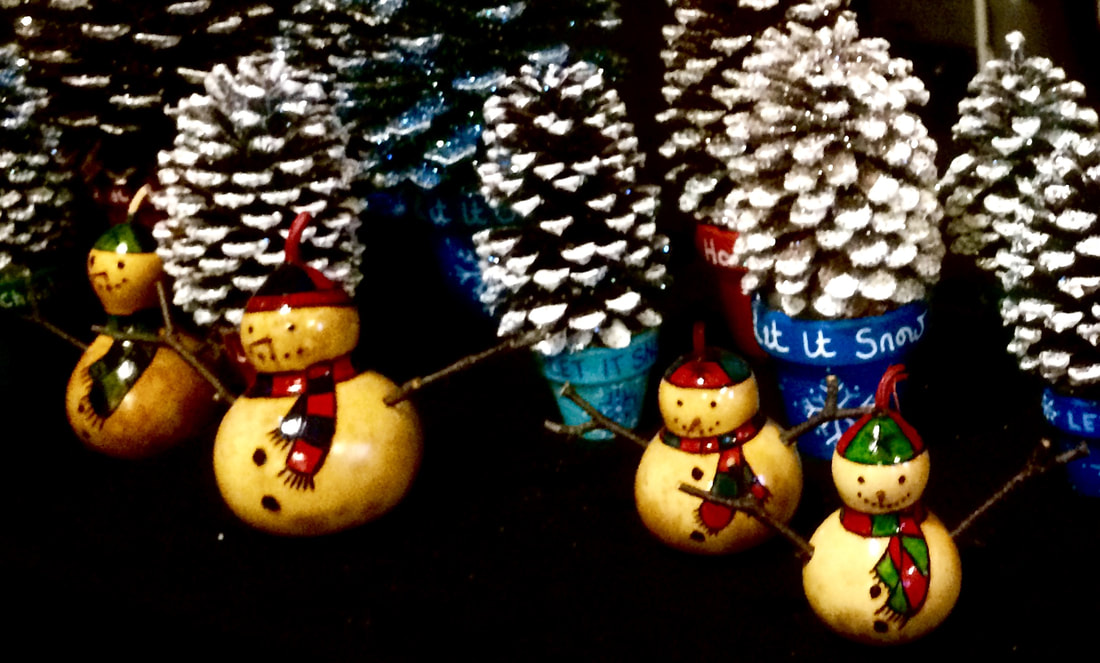 An Ornament for Belle 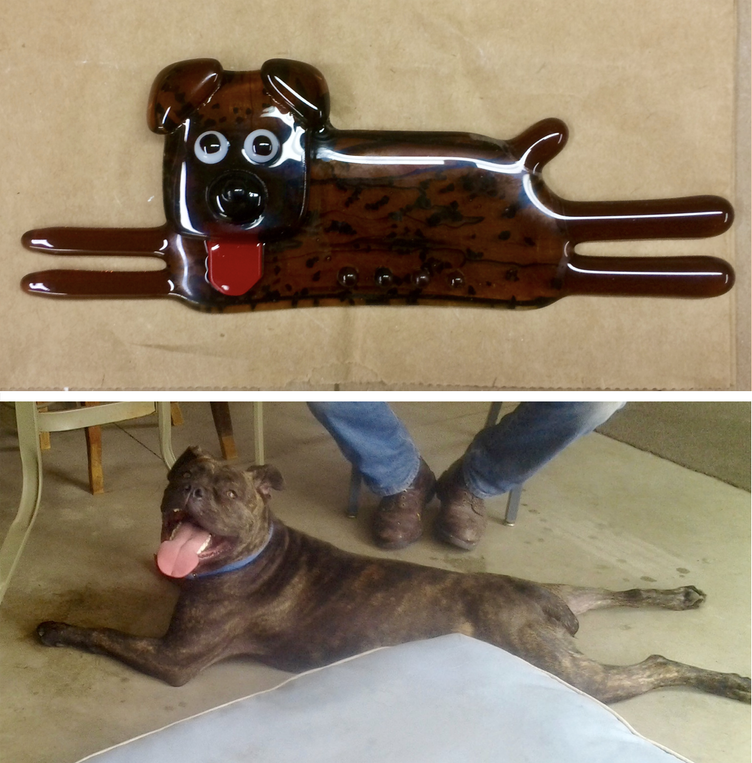 Belle is a pitbull-mastiff mix and a very happy rescue dog! She will be enjoying her first Christmas with her new family so of course, she needed her very own ornament to hang on the tree! I'd Like To Be, Under The Sea...
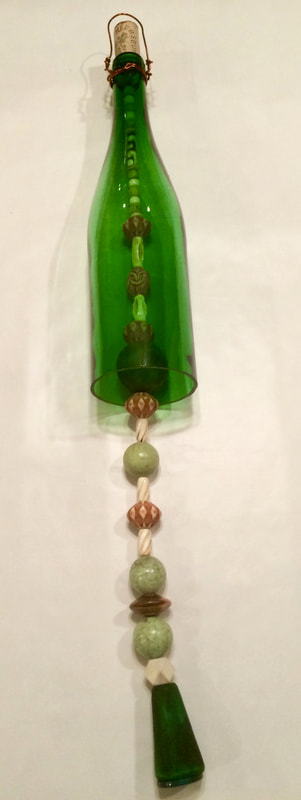
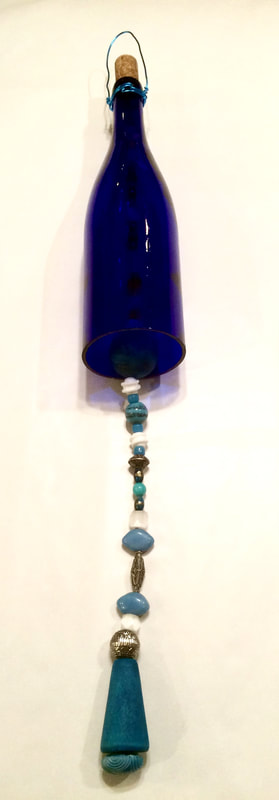
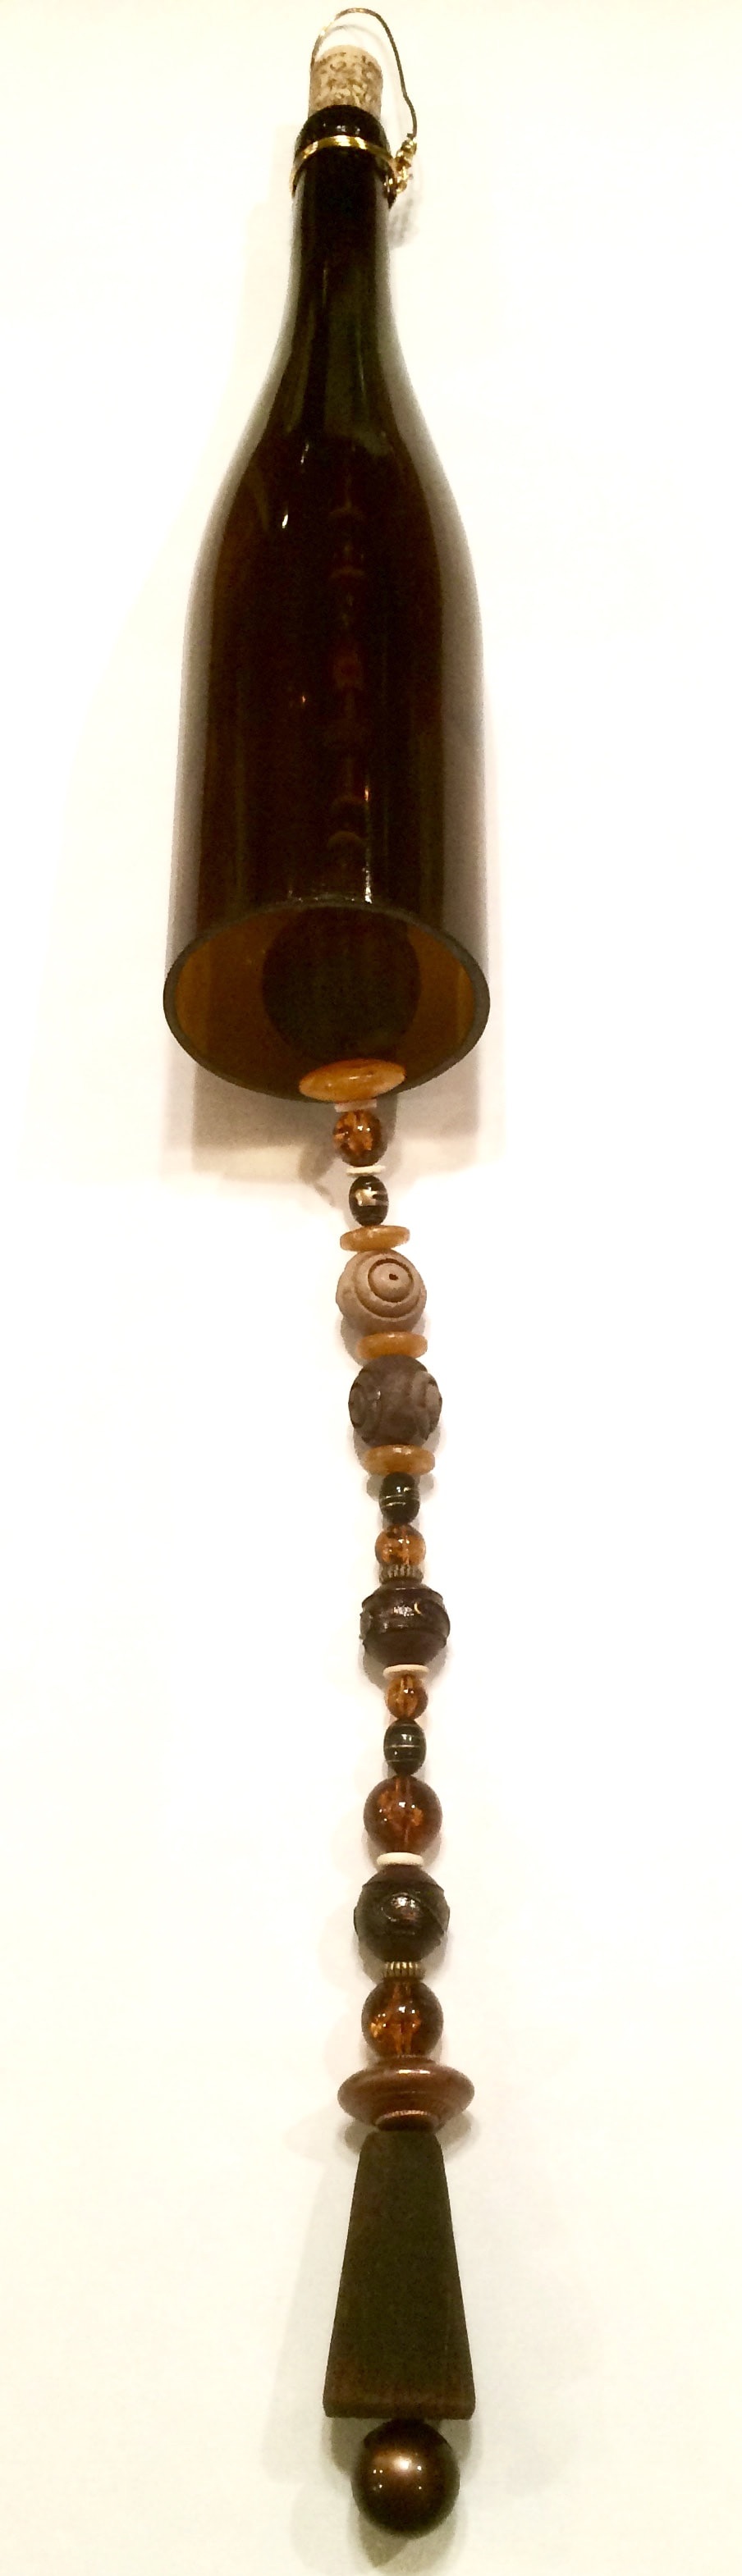
Recycling Bottles & Beads Another fun project this time using recycled wine bottles and beads. It took us several tries to cut the bottles without cracks but once we figured it out we were off & running. We made quite a dent in our bottle stash but we still have a ton of beads. Needless to say, we'll be making more bottle chimes for spring!
Follow our blog to see our latest art projects. We hope you'll be inspired.
We wish you a safe & happy holiday season. Stay warm & keep creating! |
Categories
All
Archives
April 2023
|


 RSS Feed